Assembling The Oregon Safety Chainsaw Helmet

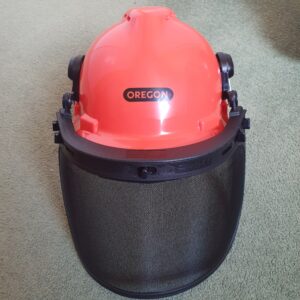
Today we’re going to look at assembling the Oregon safety chainsaw helmet. It’s relatively straightforward; with just a few pieces to click together, no tools are required.
I carried out a review of the Oregon safety chainsaw helmet last year which you can see in a previous blog post.
I have owned three or four of the Oregon chainsaw safety helmets; more often than not, the helmet is worn six days a week. It is a budget chainsaw safety helmet; however, for £19.98, it certainly does the job. The only issue I have had with the chainsaw helmet is where the earmuffs are held on to bracket the plastic eventually wears, so the earmuffs pop out of the cradle. I guess there may be a spare part for this issue; however, I have not carried out any research to find out yet.
You Can Watch The Video Below On How To Assemble The Oregon Safety Chainsaw Helmet
So first of all, find a table or workbench we can work comfortably. The first part of assembling is the earmuffs. You can see from the video that I’m pushing the clip into the helmet. Once the clip is pushed firmly into the helmet, it can’t be removed easily due to the lip that secures it firmly to the helmet. If you do ever find that you need to move the earmuffs, the clip can be removed using a screwdriver.
Once the earmuffs are in place, push the visor holder into the black plastic sockets. The visor can then be attached to the holder, as shown in the video.


