Four Main Implements Used With The BCS Two-Wheeled Tractor
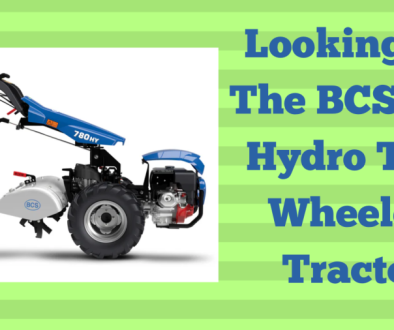
So let’s start with the machine itself. This is an old 853 BCS two-wheeled tractor. I actually use a 739 and for my application for the market gardening, I’ve been doing what you guys know me for; it’s served me just fine. It’s, it’s a smaller machine, which I prefer primarily because on my farm, I have 50-foot beds and I do a lot more turning around. So I wanted something that’s a bit leaner, but also because I am loading that into a truck to take it to different plots. So I wanted something that was a little bit light.
The Prime Features
Now for the BCS two-wheeled tractor itself, there are some features that I think aren’t absolutely necessary, I actually, you know what, it’s pretty much just one feature that I think is an absolute must. And that is to have a differential wheel lock. That means that when you turn the machine around each wheel, you can pivot in a perfect 180-degree turn. So when you go down a bed and then stop and turn around, you’re not gonna shift over into the other bed or shift out into the path; the main path between you’re going to stay perfectly stationary. I find that is the most crucial feature of a BCS. Now some of these handles here are things like brakes. I mean, this is your primary clutch on your on here, but then you’ve got these outside ones, which are basically wheel breaks. And I don’t actually find them necessary at all.
It depends on, you know, what some people do. but I find if you have your differential wheel lock, when you put your clutch in and you turn around, you’re gonna turn around perfectly in 180 degrees. And so the wheel breaks aren’t really that necessary. That’s just my opinion. And then this handle here is what actually just rotates the handlebars. This is one thing that BCS is really known for, which is very handy for market gardeners, is because you want to offset your handlebars like this when you’re going up one way in the bed. And then you’ll want, you might want to offset it another way if you’re gonna come back down. So that’s really handy. Now that’s all I want to talk about on this machine. There’s a lot more we could go into and talk about different models, but this is an older 853 and I’ve been using the 739 forever and I think it suits me just fine. The thing that’s important too to understand is that there are certain models that will or will not allow certain implements. The 7 39 that I have is big enough to run all of these implements that we’re going to look at.
Various Attachments
So let’s start with just an overview of our implements that fit the BCS two-wheeled tractor and then we’ll go into each one in detail. So we have a rotary plough here. We have got a power harrow here. We’ve got a flail mower here. And then attached to the machine itself, we’ve got a rototiller equipped with a PDR, a precision depth roller. And I’ll talk about those two things separately as if they were two implements.
I don’t know anybody using the ones you can change; I find that it does its job just fine if you know which way it goes.
And you just move in a different direction to move the soil from one side to the next. So this tool is typically used with market gardeners for shaping beds. So you can see some beds behind me here to create raised beds.
I used it earlier in the day as I really found it was good for ripping up initial ground, like when you’re breaking ground. And that’s another purpose that it has, is one, you know, breaking ground, but you have to be very careful about how you move the earth around.
And another is shaping the ground. So you might want to create some terraces and move a bunch of soil over one way. there are probably other things you can do with it too. But typically, for a market gardening context, people use the rotary plough to shape beds and create slightly healed-up raised beds. Now you’re going to use this tool in tandem with some of the other implements, particularly the power harrow, to finish the bed to get a nice level.
The Power Harrow
So let’s talk about the power harrow. A power harrow is essentially a soil-working implement like a rototiller, but it doesn’t rototill. So on a rototiller, which we’re going to look at, you’ve got tines that have an access that is horizontal, meaning that they turn vertically and that inverts the soil. There are many reasons why you would or would not want to do that, but the power harrow is essentially a solution for people who want to operate low tillage.
So they want to have minimal soil disturbance on the top. They like to be able to create a fresh look, it looks like it’s just been ploughed, but it’s not the tines that turn the soil in this way. And so there’s, this is the newer, 28-inch from Trivia Edge BCS. America sells this particular rotavator
He was just using the rotary plough in tandem with the power har. He would kick dirt from the walkways into the beds to give them a little healing and then finish them off with the rotary plough.
And so many farms can just, could really just use this, depending on what you’re doing. you could do most of your bed prep with this, but probably not initial prep. So breaking new ground, forming new beds, things like that. You’re not going to use this tool for this. A hero is really for a market. Gardens is just used for when beds are, they’ve been shaped and prepared. And this is just what you might use on an ongoing basis. So you’ve pulled a previous crop out, then you’re gonna run this to maybe mix in some new fertilizer or compost to get a nice level bed. And you, and then you’re gonna seed the bed after that. So it has a roller on the back that basically, you know, you’ve got your soil disturbance with the tines that mixes the soil up and
The Flail Mower
Here we have a flail mower. This is a favourite of many market gardeners who are trying to keep their organic matter in place. And essentially, what a flail mower does is it’s like a mower, like a lawn mower. But instead of just having vertical access, which spins a horizontal blade, it has a horizontal axis and spins the vertical blades.
You can use a power harrow to put in your new amendments and then plant again. That’s kind of typically how these are used, though. There are different combinations on how you do certain things. Each market gardener has their own way of doing it, but the flail just mows down and turns your previous crop into mulch.
I will just point out one pro and one con of rototilling. The pro of rototilling is it allows you to mix in soil amendments into your soil. So, the biggest reason for that would be if you’re turning a raw piece of land over and want to change the composition of the soil; you put in a load of compost and then rotavate it in. That actually allows you to change the physical composition of the soil, which is beneficial to getting production in there quickly. And it also loosens it up so that roots can grow down and there’s more air in the soil and they can grow faster.
Now the main con to rototilling is what’s called hard pan. And this happens with excessive rototilling. If you’re tilling the soil constantly, those tines are spinning. You might be going down about eight inches at the bottom of those eight inches. You’re gonna be compacting the soil down a little bit, creating a hard pan.
So you’ll stick your hand in the soil after it’s been tiled, it looks like nice and fluffy, but then you’re gonna reach this area that’s kind of hard. And what’s going to happen is your roots are going to grow down nice and easy for eight inches and then they’re gonna hit that hard pan and they’re not gonna know where to go. And so that can, can stunt your crops and make your carrots look short and stumpy. There are many, many things that it does.
It can also affect the water flow. It can affect how nutrients and how nitrogen and oxygen cycle through your crops. It does many things, but that’s the most common drawback to rototilling. And what most people actually do to combat the hard pan is to use a broad fork.
Precision Depth Roller (PDR)
Now the PDR that fits on the BCS two-wheeled tractor is essentially an implement that I helped BCS come up with where I said I want to have a shallow cultivation, but I don’t want to run a power harrow. The main reason I didn’t want to run a power harrow on my farm is because at the time, it was a lot heavier than it is now.
But also, I didn’t want to have to change implements. I wanted to have something all in one because it’s really all I do on my farm. I don’t change implements, I don’t use any of the other implements. And that’s partly because of the way that we operate our production. And I’ll talk a little bit more about that. But essentially, we wanted to have a cheaper, lighter, and easier-to-use implement that could establish a shallow cultivation. And so we came up with this idea of the PDR. When I came to BCS with this idea, I essentially said, Why don’t we just put a roller on the back of a tiller and see if we can jack it up and essentially do what a power hero does? And that’s more or less what we’ve done. So we have, a roller on the back of a tiller, and it’s attached to a Josephine lever.
And you can adjust the height of the tiller to get a really shallow cultivation. And the thing that happened with this that I really liked the way it is it made it so that the tiller actually operated better because a tiller on its own has a steel curtain on the back that is just attached to a hinge point and it kind of moves freely. So if you’re prepping new ground and you’re rototilling up a big area, those curtains kind of flop around. And so if you hit a, a root in the soil or a rock and your tiller bounces a little bit, you’re gonna see that little wave in the soil. Whereas with the wheel, you actually get a better finish because the wheel doesn’t move around as the steel curtain does. It just kind of keeps it level. And so I found when shaping brand new ground, I get a way better level ground finish with the PDR.
It Keeps The Ground Level
And that’s something we discovered after the fact. That wasn’t something that was initially thought about with the original design. It was just to establish a shallow cultivation. Now there’s one thing I want to point out: a disadvantage with the PDR versus a power harrow. And that is the fact that the tines spin vertically. That means if you’re going through something with a lot of organic matter and say you’re just trying to rototill in an old crop, that crop can get tied up in the tines. And it doesn’t happen with a harrow because the harrow tines are not vertical access, and they spin horizontally. They don’t get tangled up. And so that’s what can happen with the PDR the rototiller can essentially you can get stuff blocked up in the tines, which means that you have to go pull it out manually.
Now the way to combat that is two things. Either run a flail mower before grinding up that crop into a mulch. Then when you go over with your PDR, it’s not going to get tangled up in your tines. The second option is that you actually remove the crop, put that in your compost, then you go over with the PDR; you might put in some new compost or some new fertilizer, basically put in your new soil amendments and then you till them in shallow or however deep you want at that point. So that’s how you get around it. And this is the primary reason why on my farm I don’t use a flail mower and I don’t do it the same way, is because my farm is so small I don’t have the luxury of time to basically flail mow a bed and then run a PDR or a harrow and then tarp that bed for a couple of weeks.

I don’t have that time. My protocol is to fully remove the organic matter, put in some newly finished compost or soil amendments like fertilizers, manure, what have you, and then till them in and then those beds are prepped to plant again. So I’m not doing an active stale seed bedding process in my growing season. I do at the beginning of my season and I do at the end of the season, but not in the middle of the season. And so that’s the difference between a farm like mine and say a farm that Jean-Martin Fortier is doing is that he’s using a tarp in tandem with all these implements to allow the crop to decompose and then they come in and refinish the bed and then plant again. So on my farm, I can’t do that. And so that’s the difference. So for me, I don’t need to even use a quick coupler and I’ll talk about that in a minute.
But I basically have this permanently set up on my machine bolted right to it. And I’m not changing my implements on a day-to-day or weekly basis.
Without the quick coupler, you have to bring out a wrench and change two bolts every time you change an implement. And that just makes things really slow. So it really depends on your protocol. Just like how I explained the reasons why I’m only using a PDR, it’s because my protocol is to remove the previous organic matter from the crop. Then I run my PDR. If you’re not doing that and you’re running, say, a flail mower and then you’re going to immediately use a PDR or a power harrow right after to finish that off, mix that in with the soil a little bit so the crop can decompose and then you might tarp it or something like that for a couple of weeks.
Then you should have a quick coupler because you’re going to have to change that implement on a regular basis. And by not having that quick coupler, it’s going to be a hassle. So you really need to have that if you’re going to change your implements daily.
I use the BCS snowblower in the winter to manage my sidewalk, driveway, and some of my neighbour’s driveways and sidewalks. It fits on my BCS two-wheeled tractor but that’s not a farm implement. So that’s a whole other conversation. But those are our four main implements, our rotary plough, our power harrow, our flail mower, and our tiller and PDR, I kind of put together as one.


