Review Of The Etesia Hydro 80

In this video and blog post, I want to carry out a review of the Etesia Hydro 80 compact ride-on lawnmower. I used to own an Etesia Hydro 80, which I used for my contracting business. It’s a great machine, very compact and ideal for going where other ride on mowers won’t go.
Prior to owning the Etesia Hydro 80, I was using a very similar machine known as the Etesia Bahia. When I purchased the Etesia Bahia, the Hydro 80 was not available. However, the Hydro 80 is just a slightly heavier-duty compact ride-on mower than the Etesia Bahia.
If you’re using your mower for contracting, I would definitely recommend the Hydro 80 over the Etesia Bahia, as it has a slightly stronger build quality. We will go through everything and I will show some slides that will help to explain everything more clearly.
Watch A Video Review Of The Etesia Hydro 80 Below
The Cost
The price of the Hydro 80 is £5850 plus VAT, and the price of the Etesia Bahia is £5150 plus VAT. These are list prices, so I am sure that there is room for negotiation if you purchase from an Etesia dealer. I believe that the extra cost of the Hydro 80 is approximately £700 and well worth it.
There are various different models available. If you are contracting, I would go for the Kawasaki 16-hp twin-cylinder 4-stroke engine. This is the largest engine option; it’s always better to have more power than not enough!
The Reason For Purchasing The Etesia Hydro 80
The reason I purchased the Etesia Hydro 80 was that originally I was using two roller rotary mowers with a 22-inch cut. I didn’t particularly want a ride on mower, due to the manoeuvrability issue. However, I did need a machine that could cope with wet and damp grass. The problem I had was that the rotary mowers that I was using were hopeless at collecting wet and damp grass.
As many of you will know, when you are contracting, you can’t choose when to cut grass. Very often, I was cutting in less than ideal conditions. Sometimes it could be from the rain from the previous night or just a very heavy dew.

Highly Manoeuvrable
As I mentioned earlier, I didn’t particularly want a ride-on mower, due to the manoeuvrability issues. However, the Etesia is about as manoeuvrable as you get for the size of the machine. Etesia’s are famous for their ability to collect wet grass.
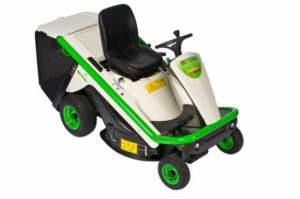
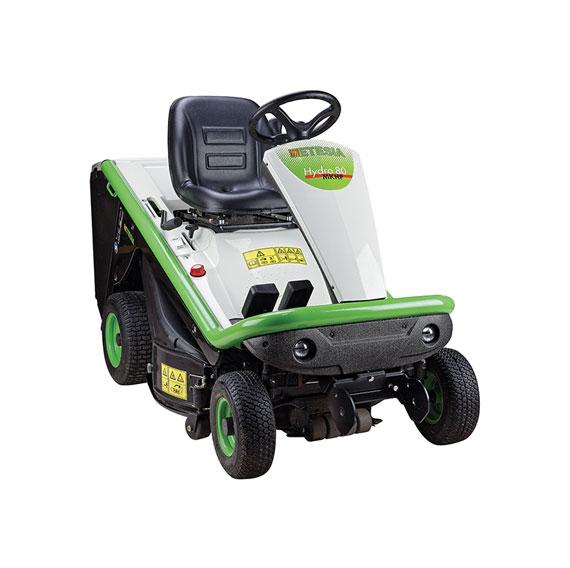
The Etesia Hydro 80 has a 32-inch (80 cm) cutting deck with a grass chute that goes straight into the collector at the rear. The collector has a capacity of 240 L, which is very good considering the size of the mower. The Etesia could achieve a better work rate with one man in a day than two walk-behind machines using two men! So, the Hydro 80 was certainly a very good investment for me.
Paddock Mower
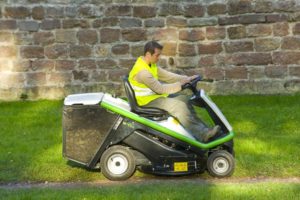
In this photograph, you can see the Hydro 80 cutting slightly rougher grass, more the type of grass that you would find in an orchard or paddock. Although the Hydro 80 will cope with this type of grass, I purchased my machine for lawn cutting. If you are regularly cutting more paddock and orchard-type areas, it’s probably worth looking at some of the other Etesia models which are available.
Anti-Scalp Rollers
The Hydro 80 has anti-scalp rollers fitted to the deck, which help to prevent scalping damage to the lawn. I also had some adjustable caster wheels, which were fitted to the side of my deck. It looks like Etesia has probably done away with the caster wheels. I’m guessing that the anti-scalp rollers do the job adequately.
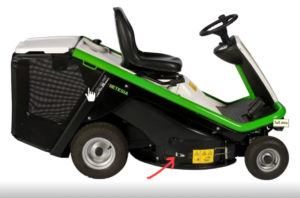
Electric Clutch
The Hydro 80 is fitted with an electric blade clutch which is operated from the dashboard. The blade clutch has a blade brake fitted for safety purposes. I always engaged and disengaged my cutter deck on tick-over as this helps to prolong the life of the electric clutch. For example, if the clutch were on a car, you wouldn’t engage the clutch at full revs!
Optional Roller
Many people, including myself, like a traditional striped lawn finish. Many of the walk-behind roller rotaries leave a really good striped finish to your lawn. I had an optional roller fitted to my Hydro 80 mower, which was fitted underneath the rear of the mower. It was simply lowered by moving a lever behind the operator’s seat. For me, it was a great option as people appreciate that striped finish on their lawns.
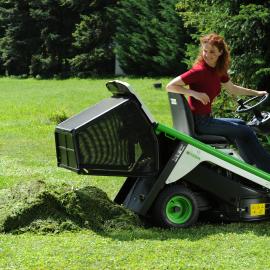
Built-In Grass Collector
The Etesia Hydro 80 is fitted with a 240 L grass collector, which can be operated from the driver’s seat. I believe on my walk behind rotary mowers, they had a collector capacity of around 70 L. So the Etesia collector is roughly 3 ½ times larger.
One of the many things I like about the Hydro 80 is the fact that I can empty the grass collector from the operator’s seat. The collector is emptied by moving a lever on the right-hand side of the machine. This is fairly effortless as it has a small manual sprung ram to make emptying the collector easier. I believe that there are some models that are electrically emptied, there certainly are on the Etesia Bahia.
There are some manufacturers that have two or three bags for collectors that have to be manually emptied. To me, this defeats the object of having a ride-on mower, as once you are seated, you do not want to keep getting on and off the mower. I certainly wouldn’t recommend purchasing a ride-on mower with that type of collector. Thankfully, with the Etesia Hydro 80, everything can be carried out from the operator’s seat.
Efficient Go Anywhere Mower
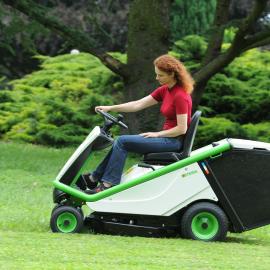
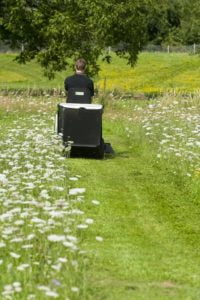
In this photograph with can see the compactness of the mower. It measures 1.98 m x 0.82 m wide, so it really is very compact. At this size, it makes the mower very easy to transport. I had a small trailer to transport my Hydro 80; it worked absolutely fine for me. Obviously, the Etesia can be transported in a van or truck.
The Hydro 80 has an excellent turning circle which makes it highly manoeuvrable; it’s almost as manoeuvrable as a walk-behind machine. The mower also leaves a great finish on any lawn.
The cutting deck overhangs the mower body fractionally; however, with a great seating position, which gives a good view which enables you to mow up to walls and obstacles.
Comfortable Seating Position
Despite the compactness of the Etesia ride-on, you can see in the photograph or video that the operator has plenty of legroom. I’m 6 feet tall, and I certainly never felt cramped up on the machine. There is a small amount of adjustment in the seat to maximise operator comfort.
Cutter Deck Hatch (Easy Access)
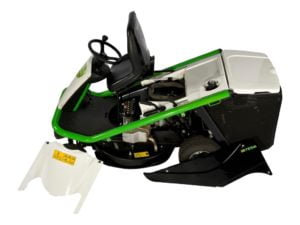
On the cutter deck, there is a large hinged door or hatch that gives easy access to the blade and the grass chute. The 32-inch blade is attached by one main bolt and then has two shear bolts to protect the blade. This is a great idea, so in theory, if you hit a foreign object, it shares the bolts rather than causing damage to the machine. The shear bolts can easily be replaced and access is gained through the hatch door.
Blade Lifters
There is one 32-inch blade on the Etesia Hydro 80. On each end of the blade, there are some large lifters that create a fan action within the deck. After a period of time, the lifters will wear. However, these are easily replaced by simply bolting a new set of lifters onto the blade.
It’s important to keep the lifters in good condition as it makes for efficient grass collection. The collection system relies on blade lifters to blow the grass into the collector. It’s also important to keep the collector clean; a power washer, airline or stiff brush can be used to keep the collector clear and keep the air flowing through efficiently.
Conveniently Laid Out Controls
All the controls on the Hydro 80 are within comfortable reach of the operator. On the left-hand side, we have the height adjustment lever; behind that is the handbrake. And then, to the rear of the mower is the fuel tank with the fuel gauge on top of the fuel cap.
On the right-hand side of the machine, there is the lever for emptying the collection box. The throttle is also placed on the right-hand side of the machine. On my machine, the cutter deck engagements which was also placed there. I believe that it may now be on the dashboard.
There’s also a built-in shock absorber to give the operator more comfort. The built-in headlights come as standard if you feel like cutting in the dark!
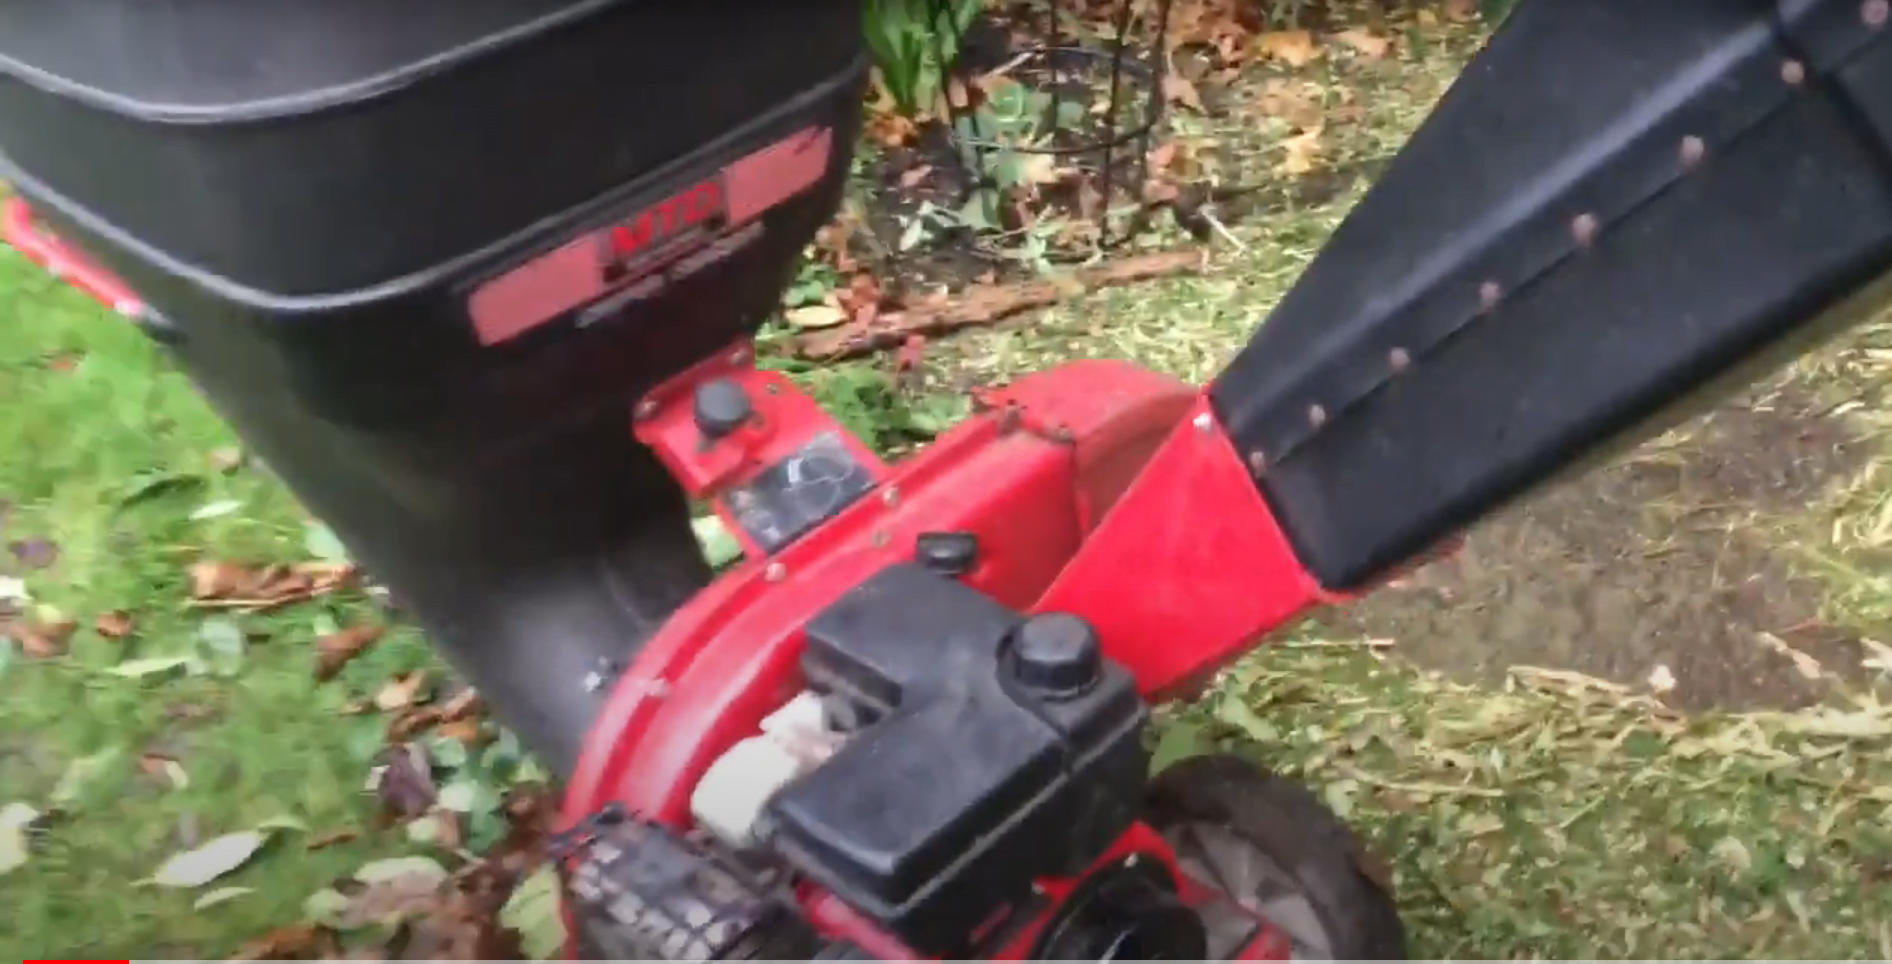
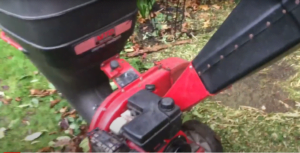
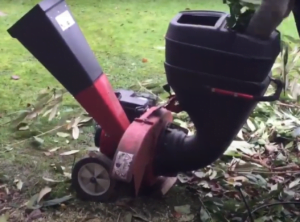
Cutting Deck Cleaner
On the top of the cutting deck, there is an attachment that allows a garden hose to be connected. Although a very simple feature, it’s great for keeping your mower deck clean along with the grass chute.
Simply attach a hose to the deck, turn on the tap, engaged the cutter deck, and after a few minutes, your cutting deck will be clean.
Inside The Etesia Hydro 80
In the above photograph, you can see that the covers have been removed from the mower. This enables the user to be able to reach the necessary components for maintenance etc. Being a compact machine, there’s not a huge amount of space to work on the machine. However, I always managed to be able to replace belts etc. and carry out regular maintenance. Incidentally, the drive belts are spring tensioned, so there is no maintenance required. I didn’t need to replace the belts very often.
It’s very easy to get to the oil dipstick and oil filler cap, and the battery has easy access. The covers are very easily removed by a few various screw-type fittings.
Hydrostatic Drive (Automatic Transmission)
The Etesia Hydro 80 is powered by a hydrostatic drive system. One of the advantages of the Hydro 80 is the fact that it has a higher specification hydrostatic drive than the Etesia Bahia.
The majority of ride-on mowers today have a hydrostatic drive system. I would not recommend purchasing a mower with a traditional gearbox and clutch, as hydrostatic mowers are so much easier and more efficient to use.
The principle of a hydrostatic mower is very simple. There is an oil pump that powers a hydraulic motor on the rear wheels. The great thing is that it gives you instant forward and reverse at variable speeds; there is no need to use a clutch or change gears!
Driving the Hydro 80 is very easy; there are two large foot pedals; one pedal is for driving forward, the other for going in reverse. It really makes mowing easy! There is no need for a foot brake as the forward and reverse pedals also act as brakes.
One of the many advantages of a hydrostatic drive is the fact that you can just vary the speed so easily. Especially if you are cutting longer grass, you can adjust the speed of the machine depending on the thickness of the grass.
Strong Tubular Frame
The Etesia has a strong tubular framework, which is a common sight on Etesia ride-on mowers. There are obviously more structures beneath the mainframe to carry the engine and transmission etc.
Another one of the benefits of the Hydro 80 over the Etesia Bahia, is the fact that it has an upgraded front axle. On the Hydro 80, the front axle is more of a casting. Whereas the Bahia, it’s built from tubular steel.
I didn’t see any wear and tear on the front axle of my Hydro 80. However, I did see somewhere on the Etesia Bahia after a considerable amount of hours of work. Another plus point for purchasing the Hydro 80 is if you are using the mower for contracting.
Mulching
I purchased my Etesia Hydro 80 for lawns and collecting the grass, so I wasn’t really interested in mulching the clippings. However, my machine did come with a mulching plug, I did test it out, just for curiosity purposes. I wasn’t overly impressed, however, I knew that I would not be mulching the grass.
Things may have changed now, as mulching has come a long way over the last few years. I believe Etesia has a slightly different mulching system from the system that I tried.
Cutting Long Grass
The Hydro 80 is a very capable machine, and it is capable of cutting longer grass. Personally, I think it’s much more at home cutting lawns; however, if the grass is dry, it will cut grass several inches high without too much difficulty. If you are looking to regularly cut long grass, then I would think more about purchasing a different machine. Etesia has a range of brush cutter machines for various grass-cutting tasks.
If you are cutting long grass and you do not want to collect the grass. The collector has a removable floor which allows the grass to be blown up the grass chute and then fall out behind the mower. The other option is to attach the deflector, which bypasses the grass chute.
Although I wouldn’t recommend the Hydro 80 for continually cutting long grass. It does leave quite a good finish, even in one pass and with long grass!
Various Accessories And Attachments
I didn’t purchase any attachments for my Etesia. However, there are some useful attachments available to get the most out of your mower. I will explain more below.
Snow Blade
An optional snow is available, it’s probably not something that I would use in this part of the UK. I am not quite sure how much pushing power the Etesia would have. In the photograph, it looks like it’s managing okay.
Scarifier
Once again, the scarifier is not a product that I have used. However, I am all for utilising the power of the Etesia! The scarifier looks like it could be a very useful accessory. It certainly looks much easier than hand raking. There are adjustments on the front wheels of the scarifier, so it can be adjusted according to the conditions of your lawn.
Scarifying lawns is something that is often neglected, so potentially a scarifier could be a great investment for the Hydro 80 or Etesia Bahia.
Spreader
The spreader looks like a very useful attachment, especially for various fertilisers for your lawn. It can also be used for grass seed or salt in the wintertime. This would require the optional towbar option.
Sweeper Attachment
Another useful attachment is the sweeper attachment; not quite sure where it gets power from. But it is certainly another way of utilising the Etesia.
Trailer Attachment
A trailer is always a great option for a ride-on mower, as there are so many uses for a trailer in the garden. The trailer has a 500 kg (half a ton) capacity, which is plenty for most gardens. Once again, you will need the towbar attachment to be able to utilise the trailer.
To Conclude
The Etesia Hydro 80 is a great compact ride-on mower to replace your existing roller rotary mowers. I would definitely recommend the roller accessory that I had fitted to give that perfect striped finish. If you are contracting or even if you have a large garden, for the extra £700 approximately. The Hydro 80 offers excellent value for money and strength over the Etesia Bahia. I don’t want to undermine the Bahia, as it is a great machine. However, I do feel that the Hydro 80 is definitely worth the extra cost.
I would also recommend purchasing the Kawasaki 16-hp twin four-stroke petrol engine. I have had Kawasaki engines on several machines and never had a problem with their engines.
It’s always better to have a machine that is overpowered rather than underpowered. The 16 hp Kawasaki engines certainly gave me power to spare.
You can see the Etesia price list here and Etesia’s website here.
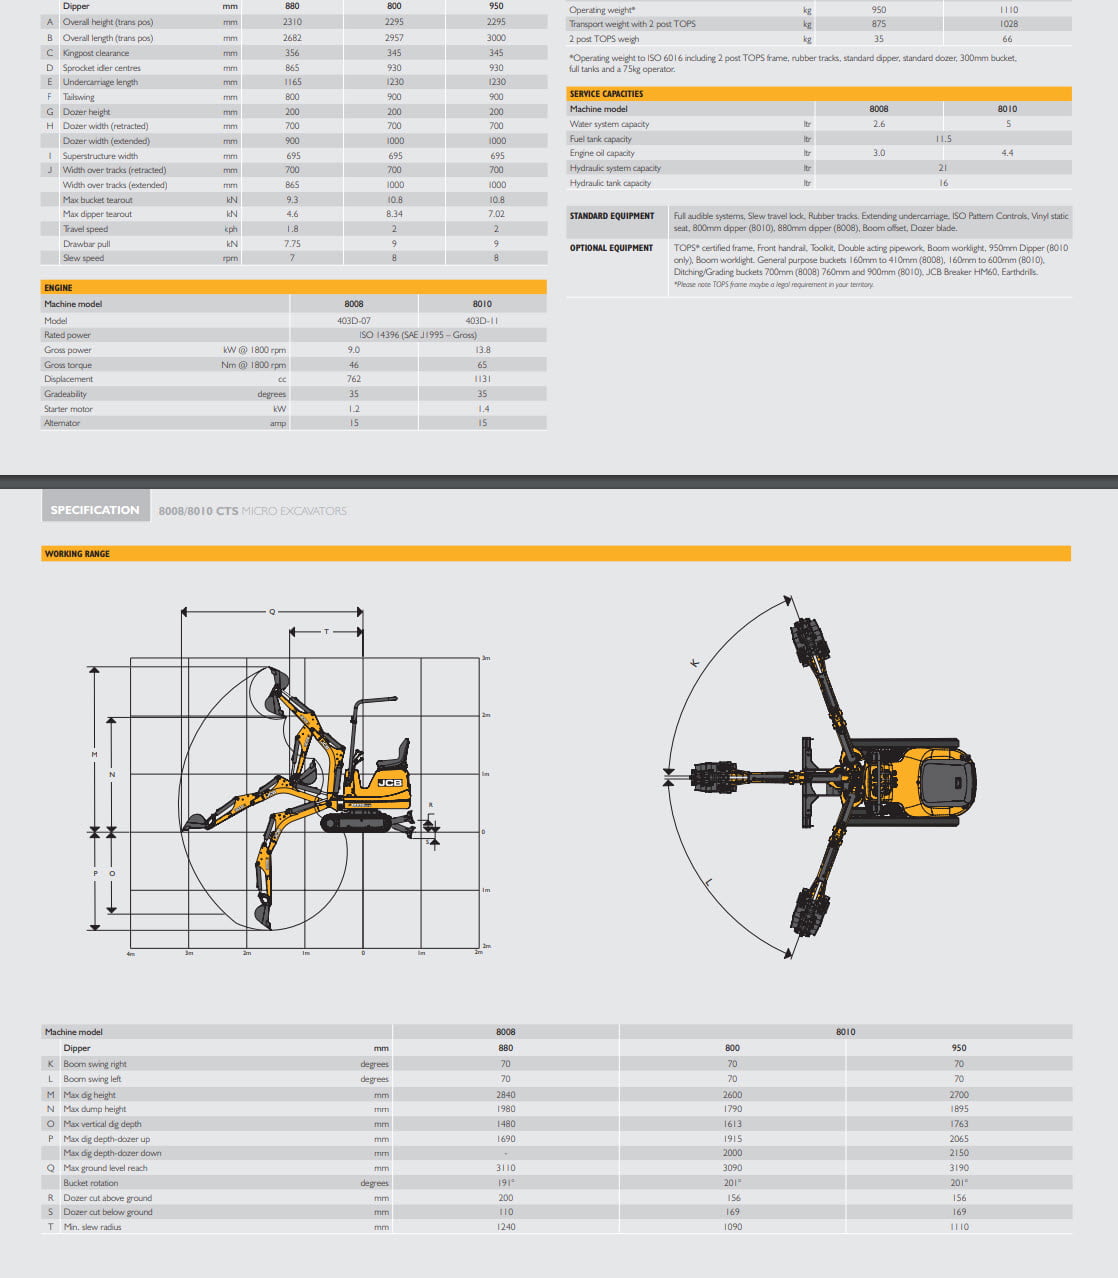
Specification
| Mower | |
|---|---|
| Theoretical output (m²/h) | 7200 |
| Number of blades | 1 |
| Cutting width (cm) | 80 cm |
| Mowing deck | Steel deck |
| Mount type | Suspended and removable deck |
| Rotation direction | Hourly |
| Blade protection | By shear bolt |
| Type of blade clutch | Electromagnetic with built-in brake |
| Cutting height (mm) | from 44 to 102 mm |
| Emptying systems | |
|---|---|
| Grassbox capacity (L) | 240 L |
| Grassbox emptying | Ground assisted emptying |
| Grassbox structure | Tubular structure – anti UV |
| Measurement and weight | |
|---|---|
| Weight | 240 Kg |
| Height | 130 cm |
| Width | 82.5 cm |
| Lenght | 199.5 cm |
| Motor |
|---|
| Motor | |
|---|---|
| Number of cylinders | 2 |
| Cylinder capacity | 603 cm³ |
| Nominal engine power | 9.3 kW/12.5 HP |
| Maximum engine power | 11.9 kW/16 HP |
| Fuel tank capacity (L) | 12 L |
| Oil tank capacity (L) | 1 L |
| Cooling | 2 cylinder, air cooled |
| Fuel | unleaded fuel 95/98 |
| Power | Electronic with transitor |
| Starter | 12 volts 20 Amp. with regulator |
| Engine type | Kawasaki FS481V |
| Battery | 12V – 20 Ah |
| Wheel transmission |
|---|
| Wheel transmission | |
|---|---|
| Transmission type | Hydrostatic |
| Forward speed (km/h) | 9 km/h |
| Backward speed (km/h) | 8 km/h |
| Oil | 2 L |
| Number of driving wheels | 2 |
| Vertical drop | 18% |
| Acoustic pressure | 86 dB(A) |
| Frame | Multi-tubular mechanical welded frame |
| Direction | Mechanical |
| Pneumatic | Front: 13×5.0-6 – Back: 16×6.5-8 |
| Braking | Incorporated in hydrostatic transmission |
| GPS/GPRS | -I I |